


Build two bridge designs
Plan and build two different designs using the same materials.
CLASSROOM PROJECT · ENGINEERING
Build two designs. Test them fairly. Explain what changed.
Teacher-prepared materials. Students fold, tape and test.

Teacher demonstration
Plan and build two different designs using the same materials.
Run three trials for each design with the same car and gap.
Compare the results and explain what changed in Design B.
Standards connection: K–2–ETS1–3 · Compare test results from two designs.
BEFORE CLASS
A suggested setup for 24 students working in 12 pairs. Allow about 25 minutes for teacher preparation, separate from the two 40-minute lessons.

| Material | Per pair | 12 pairs |
|---|---|---|
| Thin paperboardTwo matching sheets, each 20 × 15 cm; pre-cut by the teacher. | 2 sheets | 24 sheets |
| Wood blocksTwo equal-height supports. | 2 blocks | 24 blocks |
| Blue toy carUp to 4 cm wide; use the same car for every test. | 1 car | 12 cars |
| Masking tape | 1 m | 12 m |
| Ruler | 1 ruler | 12 rulers |
| Recording sheet | 1 sheet | 12 sheets |
| Pencils | 2 pencils | 24 pencils |
Use matching paperboard for designs A and B. Keep each pair's support gap at 10 cm and use the same toy car for every test.
03 / THE TEACHING FLOW
Choose a step for the teacher prompt, student action, and evidence to look for. Each lesson includes time to test, share, and reset.
Step
Lesson 1 · Build & test 0–5 min

How can we help this car cross a 10 cm gap without holding the bridge? Show the car and two equal-height supports.
Look at the gap. Tell your partner what the bridge needs to do.
Students name both goals: the car crosses and the bridge stays up.
Lesson 1 · Build & test 5–10 min
Model a gentle crossing. Show how to record crossed and stayed up. Use pre-cut paperboard; students fold, tape, and test.
Check the materials. Place the supports 10 cm apart and decide who will test first.
Pairs can point to the bridge deck, supports, and gap, and explain a successful test.
Lesson 1 · Build & test 10–25 min
Where will each end of your bridge rest? Leave time to sketch first. Help with folding and tape as needed.
Sketch the plan, then build Design A with one 20 × 15 cm sheet and up to half the tape. Take turns folding and taping.
The bridge spans the gap and rests on a support at each end.
Lesson 1 · Build & test 25–35 min
Keep the supports 10 cm apart. Push gently from one support to the other. Do not hold the bridge during a trial.
Complete three trials with the same car. Swap tester and observer. Record crossed and stayed up after each trial.
Three recorded results and one observation. Students report what happened, even if the bridge did not work.
Lesson 1 · Build & test 35–40 min
What did your tests show? What might you change next time? Keep Design A so you can compare it with a second design.
Share one observation. Label and store Design A and the recording sheet. Clear the workspace.
Each pair names one observation and saves the first design and its evidence.
Lesson 2 · Change & compare 0–8 min
Read your first results. Which fold or shape will you change? Both designs may pass; your job is to compare what happens.
Look at Design A and its test record. Sketch Design B and point to one planned change.
Students identify a specific change and connect it to an observation from Lesson 1.
Lesson 2 · Change & compare 8–23 min
Use the second sheet and the remaining half of the tape. Keep the first bridge intact for comparison.
Build Design B using the second 20 × 15 cm sheet. Take turns and check that both ends rest on the supports.
The two designs show a clear difference while using the same sheet size and tape allowance.
Lesson 2 · Change & compare 23–33 min
Use the same car, the same 10 cm gap, and the same test method. What do the two records tell you?
Test Design B three times and record each result. Compare A and B with your partner, using the trial records.
Students refer to actual results when describing how the two designs performed.
Lesson 2 · Change & compare 33–40 min
Point to one change. Complete: We changed ____. In our tests, ____. Accept a spoken, drawn, or written response.
Explain one change and one observed result. Turn in the recording sheet, sort reusable materials, and clear the workspace.
Each student identifies a real design change and supports a statement with an observation.
Keep the test fair: use the same car, the same 10 cm gap, and three trials for each design. Both bridges may pass—record what actually happens.
04 / Collect the evidence
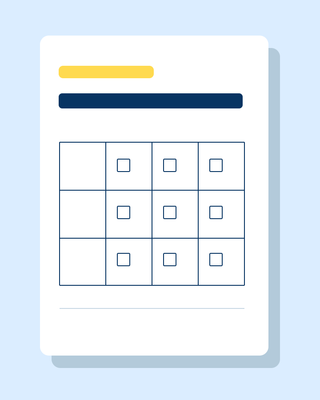
Test both bridges across the same 10 cm gap with the same toy car. Record what happened in each trial, then explain one change.
Check a box only when that result happened. Test each design three times. Both designs may work.
| Our design | Trial 1 | Trial 2 | Trial 3 |
|---|---|---|---|
|
Design A
Our first bridge |
|||
|
Design B
We changed one fold |
|||
Swipe the table sideways to see every trial.
A blank box means the result was not recorded as happening. Use the observation notes to explain a failed or skipped trial. Keep the gap, car, and testing method the same.
These entries are temporary. This section does not submit or save student records. Print a copy if you need one.
READY FOR YOUR CLASSROOM
Keep the lesson plan, test record and teaching prompts together for your next bridge-building session.

FOR THE TEACHER
The two-session teaching flow, preparation checklist and prompts for each stage.

FOR EACH PAIR
Record three tests for designs A and B, then describe what changed and what you noticed.

FOR THE CLASS
Keep the challenge, testing rules and discussion prompts ready for your classroom.
